A quick gist to cover the basics of adding dnsmasq to your mac and setting up the domain *.test to point at your local development environment, or more granular control if you want it.
.test is reserved for DNS testing as is .example.
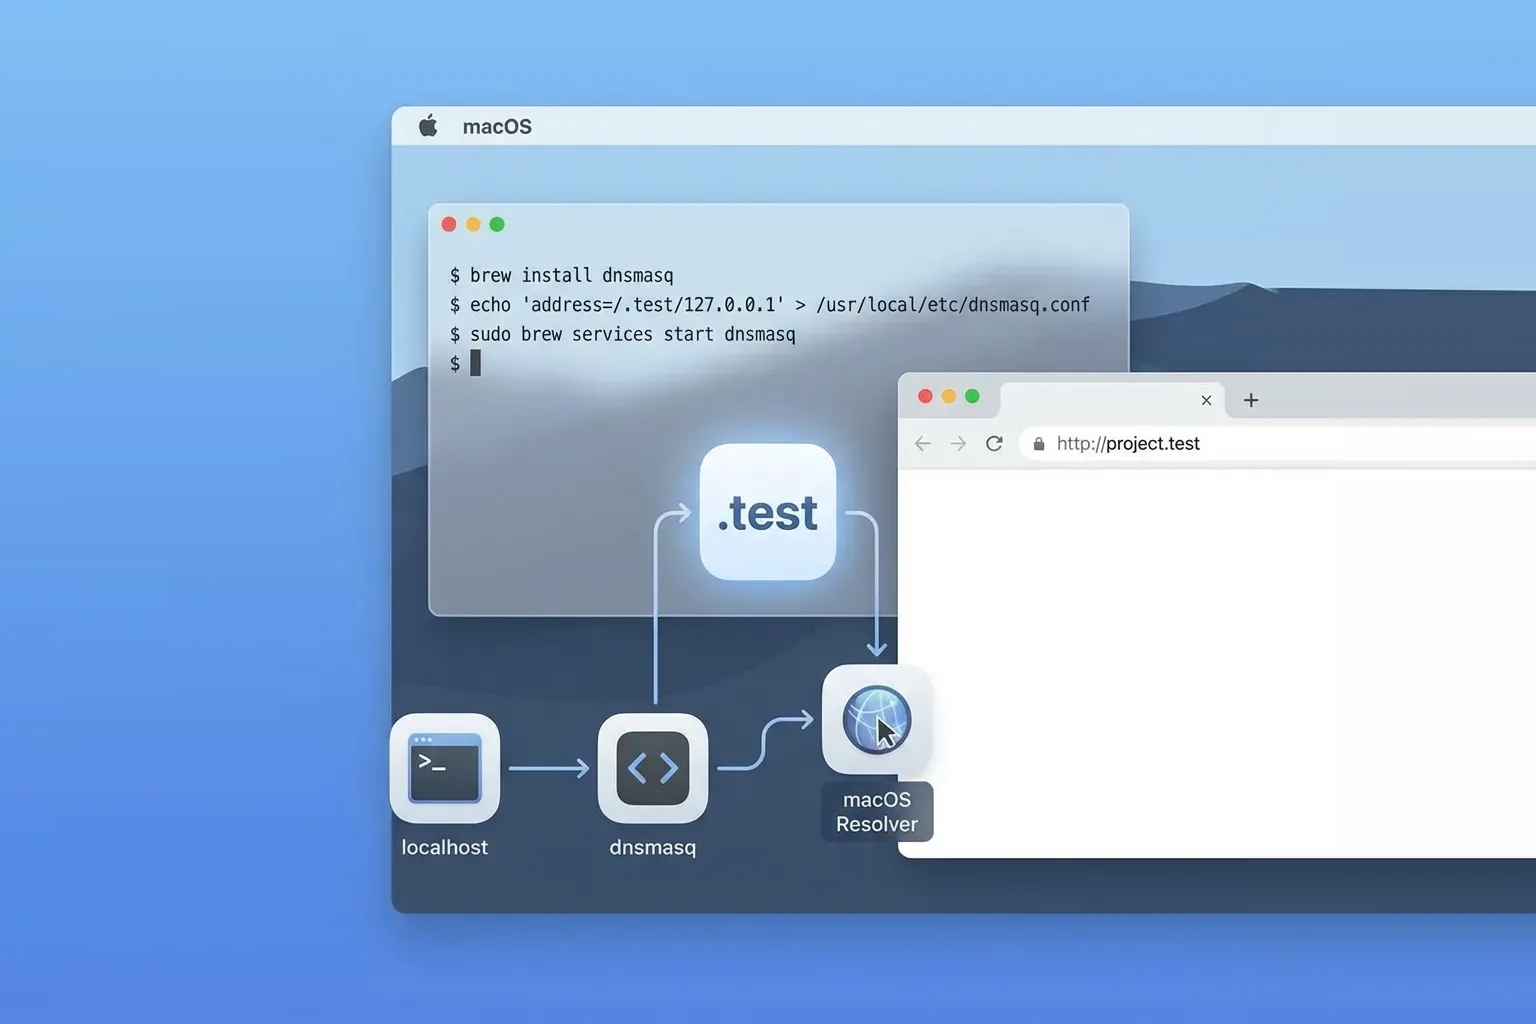
$ brew install dnsmasqAppend this line via your editor of choice to the /usr/local/etc/dnsmasq.conf
address=/.test/127.0.0.1start dnsmasq, you can also use restart in place of start when you make changes.
$ sudo brew services start dnsmasqSetup DNS resolving of *.test requests by adding the following test file in
/etc/resolver creating the directory if required. below uses the tee command
write the three lines into the /etc/resolver/test file
$ sudo mkdir -p /etc/resolver
$ sudo tee /etc/resolver/test > /dev/null <<EOF
nameserver 127.0.0.1
domain test
search_order 1
EOF
Finally check it’s working by pinging a couple of made-up domains ending in .test wild.test and more.wild.test
$ ping -c 2 wild.test
PING wild.test (127.0.0.1): 56 data bytes
64 bytes from 127.0.0.1: icmp_seq=0 ttl=64 time=0.032 ms
64 bytes from 127.0.0.1: icmp_seq=1 ttl=64 time=0.070 ms

--- wild.test ping statistics ---
2 packets transmitted, 2 packets received, 0.0% packet loss
round-trip min/avg/max/stddev = 0.032/0.051/0.070/0.019 ms
$
$ PING more.wild.test (127.0.0.1): 56 data bytes
64 bytes from 127.0.0.1: icmp_seq=0 ttl=64 time=0.035 ms
64 bytes from 127.0.0.1: icmp_seq=1 ttl=64 time=0.080 ms

--- more.wild.test ping statistics ---
2 packets transmitted, 2 packets received, 0.0% packet loss
round-trip min/avg/max/stddev = 0.035/0.058/0.080/0.023 ms
That’s it, shout if you’d like more detail.
stop or start dnsmasq
$ sudo brew services stop dnsmasq
$ sudo brew services start dnsmasq